Single-Cell Spatial Transcriptomics: H&E and DAPI Image Registration Guide
Introduction
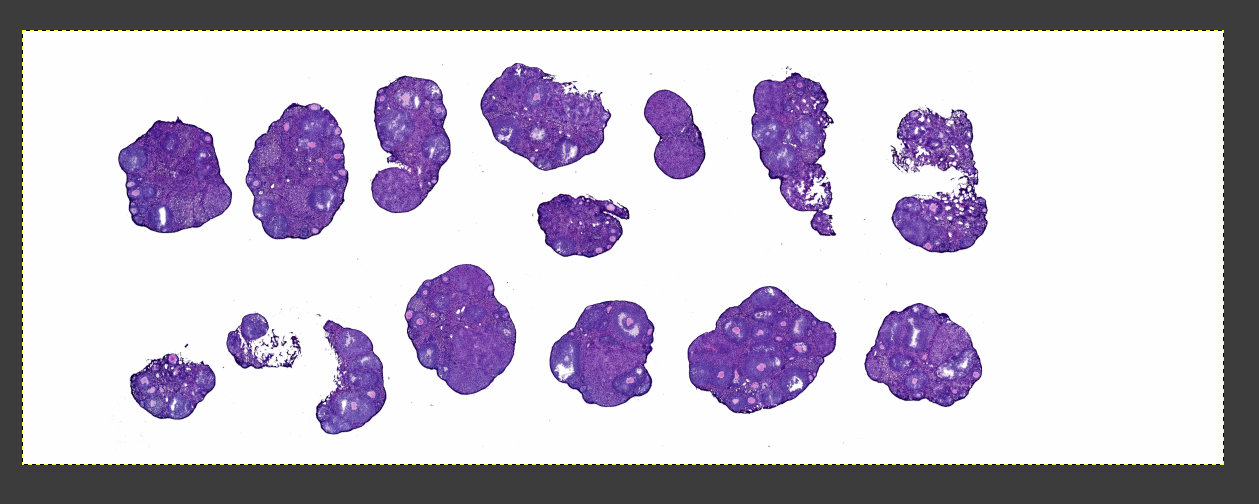
In the workflow of Spatial Transcriptomics and multi-modal image analysis, researchers often acquire different dimensions of information from consecutive adjacent tissue sections. Specifically, in SeekGene's Single-Cell Spatial Transcriptomics technology, gene expression data is captured and localized based on the DAPI-stained section containing fluorescent signals. Meanwhile, to obtain a clearer reference of pathological tissue morphology, high-resolution H&E brightfield images are usually acquired from its adjacent section.
Due to variations in section placement on the microtome, physical deformations, and field-of-view differences across imaging platforms, images from these adjacent sections naturally lack spatial alignment. To accurately map the gene expression data of spatial transcriptomics onto the high-resolution histological features of the H&E image in subsequent data analysis (such as cell segmentation and clustering annotation), Image Registration is an indispensable and critical step.
This tutorial provides a standardized manual operation protocol, guiding you on how to use GIMP, an open-source and powerful image editing software, to achieve high-precision spatial alignment between H&E brightfield images and DAPI fluorescent images. Through this tutorial, you will master core techniques including image preprocessing, layer stacking, spatial transformation (scaling, moving, rotating), and background restoration.
Prerequisites
Before executing the registration workflow, please ensure you have prepared the following operating environment and data files:
- Software Requirements:
- Please download and install GIMP version 2.10.36 (GNU Image Manipulation Program). GIMP supports Windows, macOS, and Linux operating systems. It is recommended to run it on a computer with high specifications (especially sufficient memory) to meet the processing demands of high-resolution medical images.
- Input Image Data:
- DAPI Fluorescent Image (
.tiffor other compatible formats): Serves as the physical coordinate reference for spatial transcriptomics data. This image can be a raw scanned section directly exported from a microscope, or an intermediate product image that has already been processed by upstream pipelines like SeekSpaceTools and aligned with the expression matrix. - H&E Stained Image (
.tiff): A high-resolution section image obtained by brightfield microscope scanning. Please note that such medical imaging files typically contain multiple pyramidal layers of different resolutions (Pyramidal TIFF). This tutorial will guide you on how to correctly extract the required highest-resolution layer.
- DAPI Fluorescent Image (
Raw DAPI Stained Image Preprocessing
Raw DAPI fluorescent images often contain extensive useless background or black borders, and their aspect ratio may not match the actual physical dimensions of the spatial chip. In this phase, we will perform orientation correction and standardized cropping on the raw DAPI image to make it precisely match the effective area of the spatial transcriptomics chip.
TIP
Workflow Applicability Tip: The operations in this phase are not only a prerequisite for H&E registration but also serve as the standard preprocessing workflow for SeekSpace™ Tools DAPI input files. If you need to input the raw DAPI image exported from the microscope into SeekSpace™ Tools for analysis, you can completely follow the steps in this phase for cropping and processing.
Skip Condition: If your DAPI image is already an image processed by SeekSpace™ Tools and has completed expression alignment, please skip this phase directly and proceed to Fine Registration of H&E and DAPI Images.
Import DAPI Image
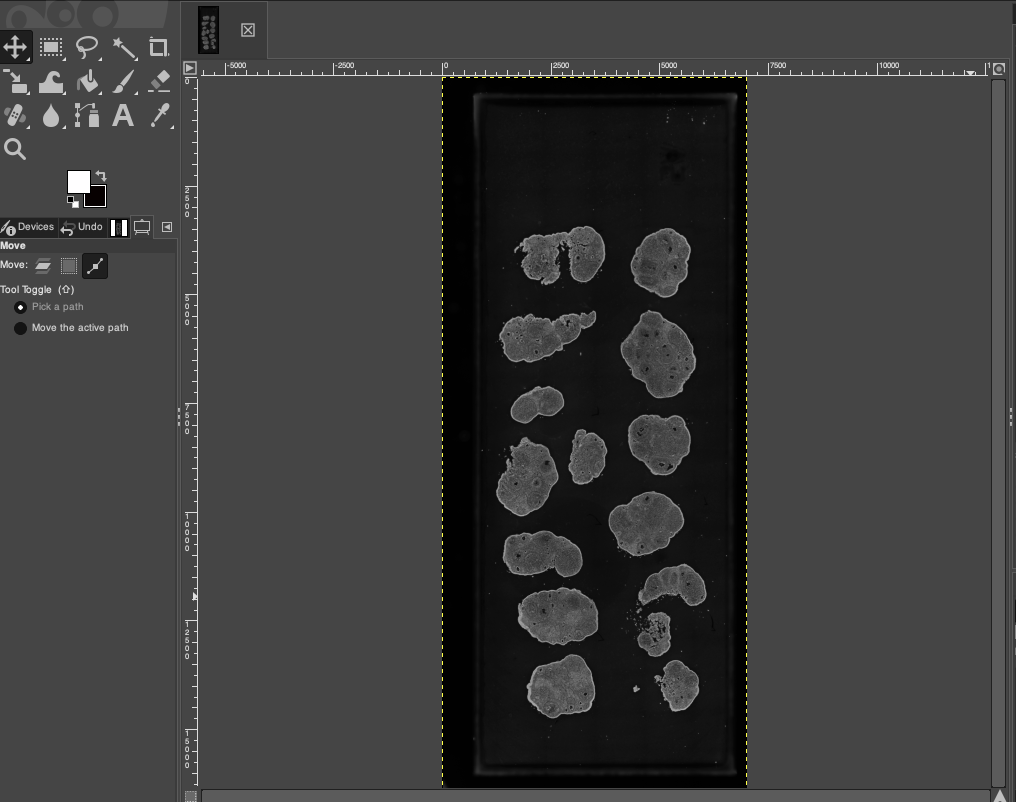
Open the GIMP software. Through the menu bar, select File > Open..., or select the target DAPI image in the file explorer and drag it directly into the GIMP workspace to import it. After importing, you will see the raw fluorescent image containing the full scanning field of view.
Correct Image Orientation
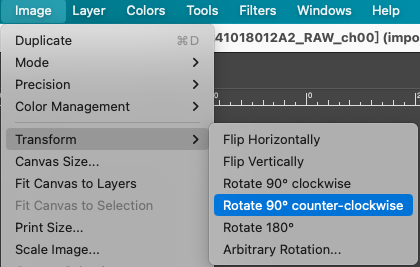
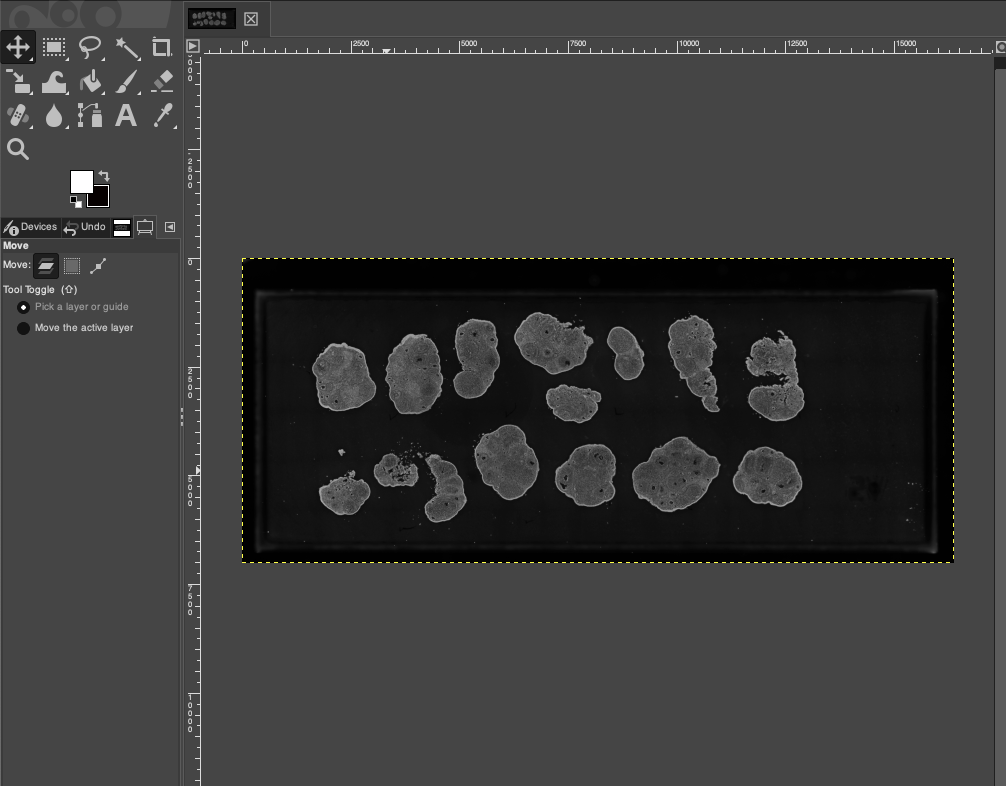
The placement orientation of sections during microscope scanning may vary. To facilitate subsequent reference line marking and standardized cropping, we first need to adjust the chip to a standard horizontal orientation.
- Observe the tissue and chip outlines in the image. If the orientation is incorrect, select the corresponding rotation operation in the menu bar, for example: Image > Transform > Rotate 90° counter-clockwise.
- Ensure that the tissue orientation of the section is consistent with the expected length-to-width direction of the chip, which is crucial for subsequent cropping at a fixed ratio.
Add Reference Lines to Mark Boundaries
To ensure cropping precision and avoid visual errors during manual selection, we need to utilize GIMP's reference line (Guide) function to strictly mark the effective edges of the spatial chip (i.e., the boundaries of the fluorescent area containing spatial Barcodes).
- Move the mouse to the ruler area above (horizontal ruler) or to the left (vertical ruler) of the workspace.
- Hold down the left mouse button and drag inwards into the image to pull out a horizontal or vertical reference line (as indicated by the red arrow below).
- Carefully observe the image and place the reference lines precisely at the edges of the effective capture area of the chip with fluorescent signals (as indicated by the blue arrows below).
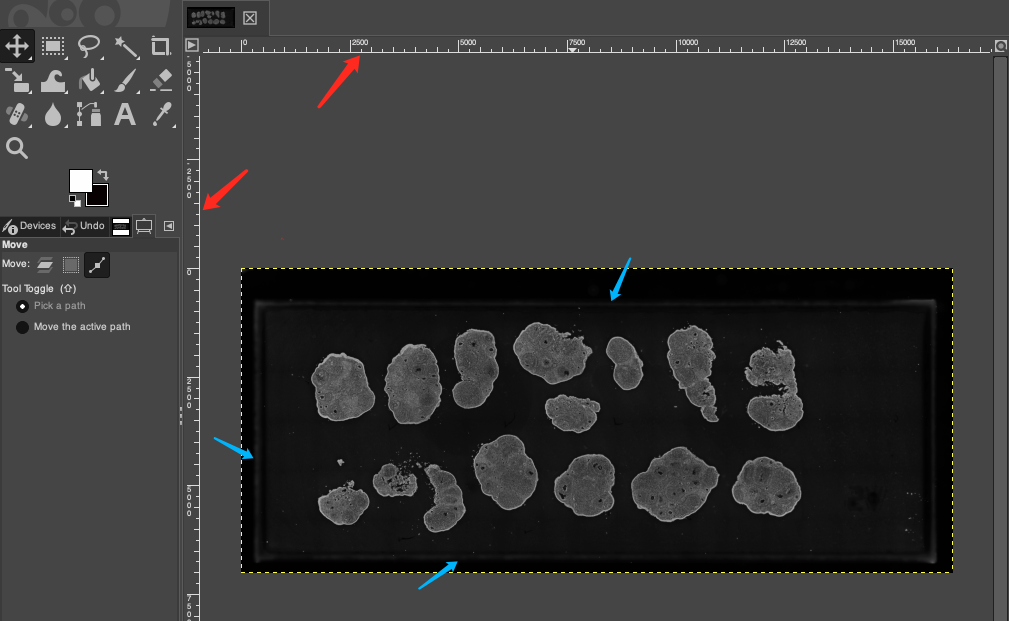
TIP
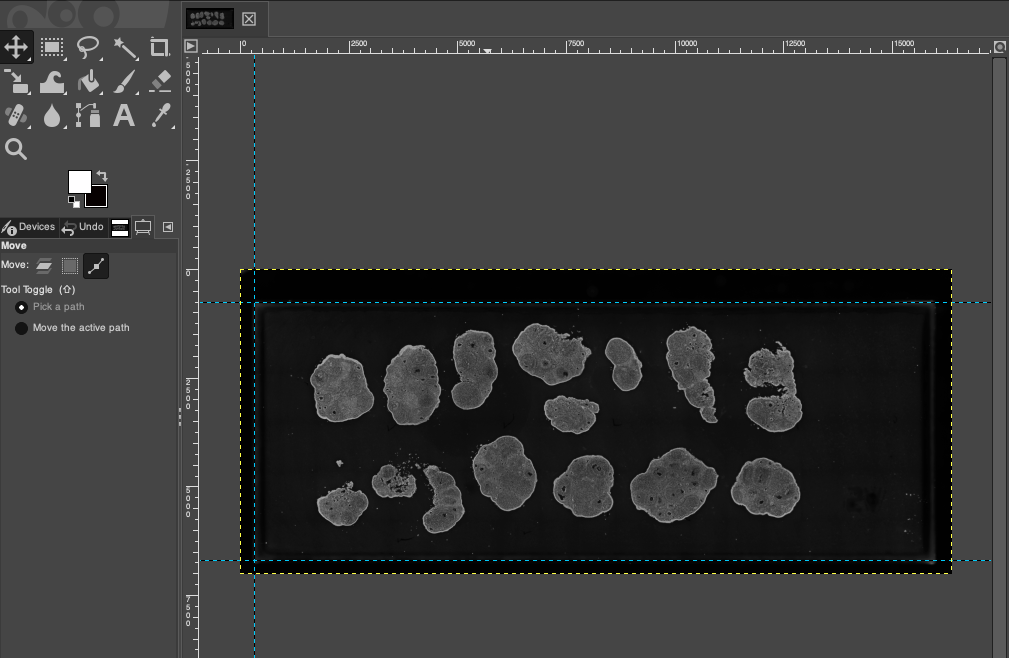
Reference Line Placement Suggestion: It is generally recommended to mark only the top edge, bottom edge, and left edge of the chip. Leave the right side or irregular edges open, so that in the next step, the fixed aspect ratio can be used to automatically constrain the right boundary, ensuring the overall cropping proportion is not distorted. The effect after completing the reference line placement is as follows:
Crop at a Fixed Ratio
The SeekGene Single-Cell Spatial Transcriptomics chip has a specific physical dimension aspect ratio. To ensure perfect mapping between image coordinates and actual chip coordinates, cropping must be performed at a fixed ratio.
- Click the Crop Tool in the left toolbar, or use the shortcut key
Shift + C. - In the Tool Options panel on the left, check Fixed (Aspect ratio), and set the standard chip aspect ratio to
2.765:1in the input box below. - Move the mouse cursor to the intersection vertex of the left horizontal and vertical reference lines (indicated by the red arrow), click and drag towards the bottom right to generate a crop box. Thanks to the snapping function of the reference lines, the starting point of the crop box will perfectly fit the edge.
- After confirming that the crop box has covered the effective tissue area, press the
Enterkey or double-click inside the selection to complete the cropping operation.
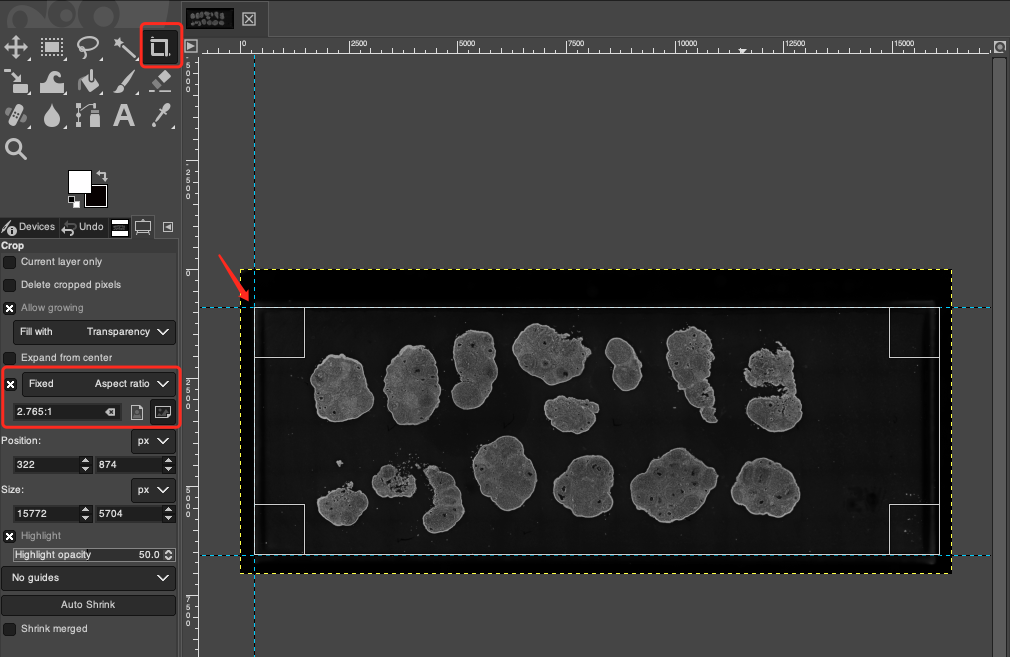
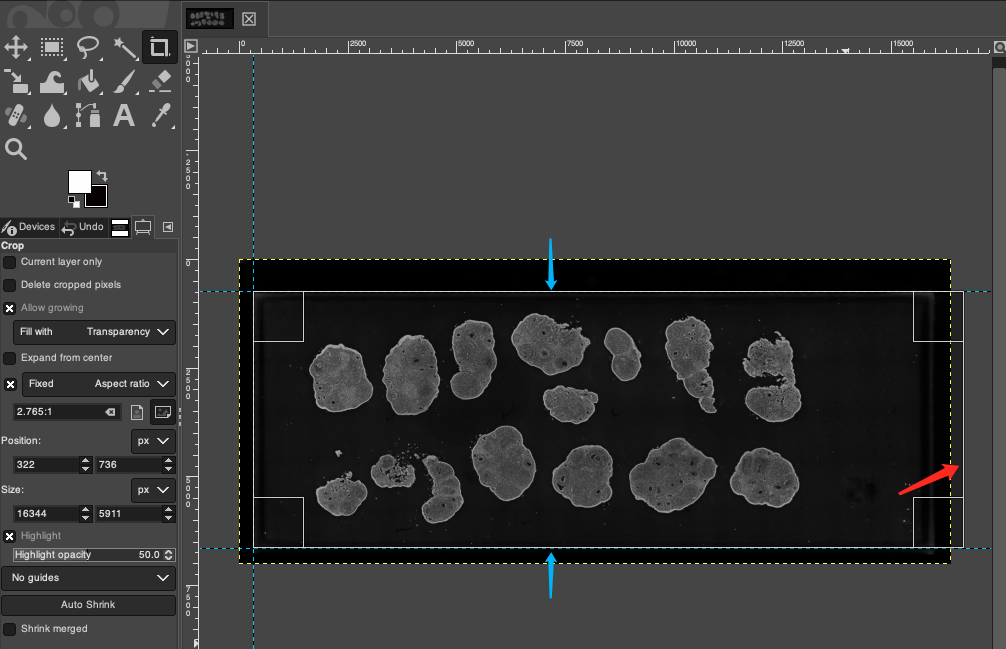
WARNING
Edge Overflow Handling: When dragging to generate the crop box, if you find that the right edge of the crop box exceeds the original image boundary (as shown by the red arrow in the image below), it indicates that the horizontal reference lines might be marked too wide. Please slightly adjust the two horizontal reference lines towards the middle of the image (in the direction shown by the blue arrows in the image below); conversely, if the crop box fails to completely enclose the tissue on the right side, please slightly adjust the horizontal reference lines towards the outside of the image. After adjusting the reference lines, redraw the crop box to try again.
Export Preprocessed Image
After completing the orientation correction and standardized cropping, we need to save this processed DAPI image for use in the next step of H&E registration or as an input for SeekSpace™ Tools.
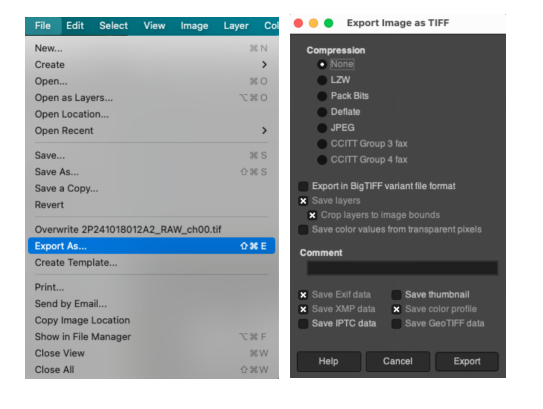
- Sequentially click File > Export As... in the menu bar.
- In the pop-up dialog box, set the file format to
.tiff(a lossless format is recommended to preserve fluorescent details), enter an appropriate filename, select the save path, and click export.
Fine Registration of H&E and DAPI Images
In this phase, we will use the preprocessed DAPI fluorescent image as the spatial coordinate baseline to precisely overlay and align the H&E brightfield image containing high-resolution morphological information with it. This is the most core step in spatial transcriptomics data analysis and directly relates to the accuracy of subsequent gene expression data mapping.
Import H&E and DAPI Image Layers
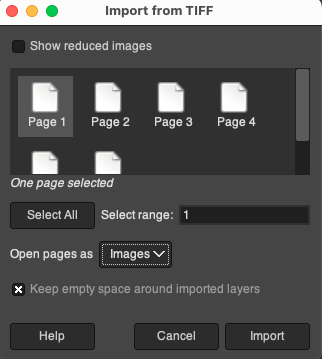
- First, drag the raw H&E stained brightfield image file into the GIMP workspace. Since high-resolution microscope scanning files usually contain multiple pyramidal layers of different resolution levels, in the pop-up import prompt box, please be sure to select only the first layer (Page 1) to ensure that the imported image is the full-size brightfield image with the highest resolution.
- After the H&E image is successfully loaded, directly drag the preprocessed DAPI
.tiffimage cropped in Phase 1 into the same GIMP workspace. At this point, the DAPI image will automatically act as a brand new independent layer, superimposed on the original H&E image, forming a multi-layer working state.
Layer Rearrangement and Opacity Setting
To be able to simultaneously see the overlapping relationship of the two image layers and perform precise alignment, we need to adjust the vertical order and opacity of the layers.
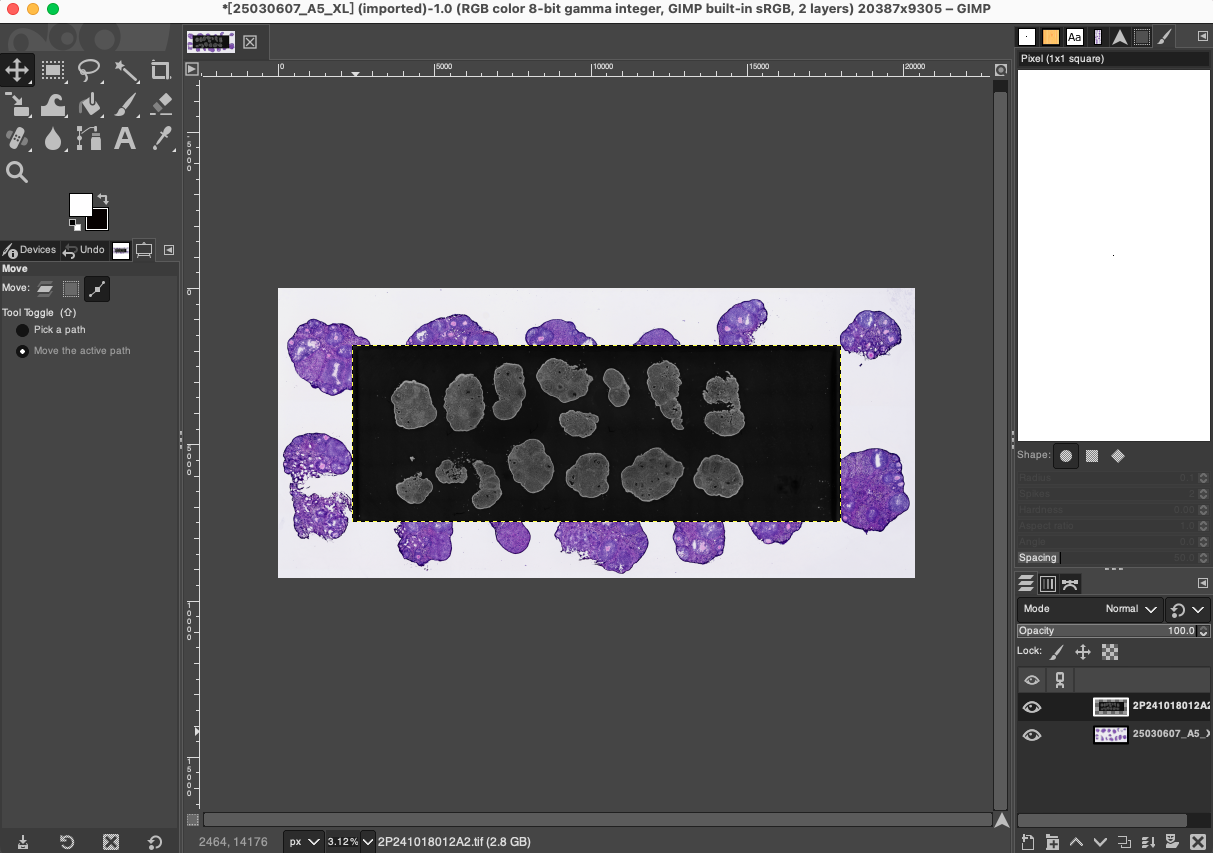
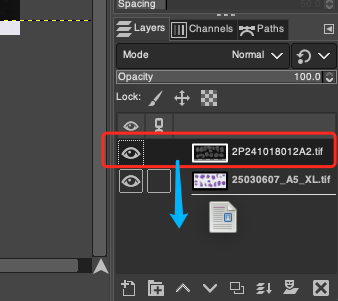
- In the Layers panel at the bottom right corner of the GIMP interface, you can clearly see the two currently loaded layers. To conform to the operation logic of "using DAPI as the base map reference to adjust H&E", please drag the layers with the mouse to adjust their hierarchical order, ensuring that the H&E layer is at the very top and the DAPI layer is at the very bottom.
- Select the H&E layer located at the top, and drag its corresponding Opacity slider at the top of the Layers panel to the left, reducing it to around 20%. You can fine-tune this according to the actual staining depth of the H&E section, until you can clearly see the bright fluorescent outline of the underlying DAPI image through the dim H&E tissue on the top layer.
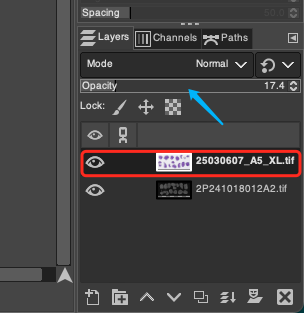
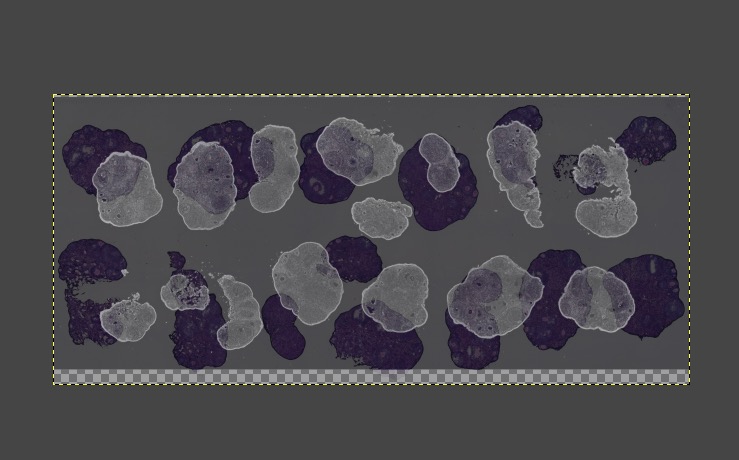
Image Spatial Transformation (Move, Scale, and Rotate)
After adjusting the opacity, you need to completely align the morphological features of the two image layers through moving, scaling, and rotating operations.
TIP
Operation Guide: The following three operations (scaling, moving, rotating) do not have an absolutely strict sequential requirement. However, in practical operation, to improve registration efficiency, it is generally recommended to follow the sequence of "scale first (rough size adjustment), then move (align position), and finally rotate (calibrate angle)" as the initial steps. Due to the complexity of section deformation, after completing an initial round of adjustments, you often need to alternately and repeatedly use these tools based on the specific overlapping condition of the images, gradually approaching the optimal alignment effect, until the overall outlines and major tissue structures of the two sections reach a satisfactory level of matching.
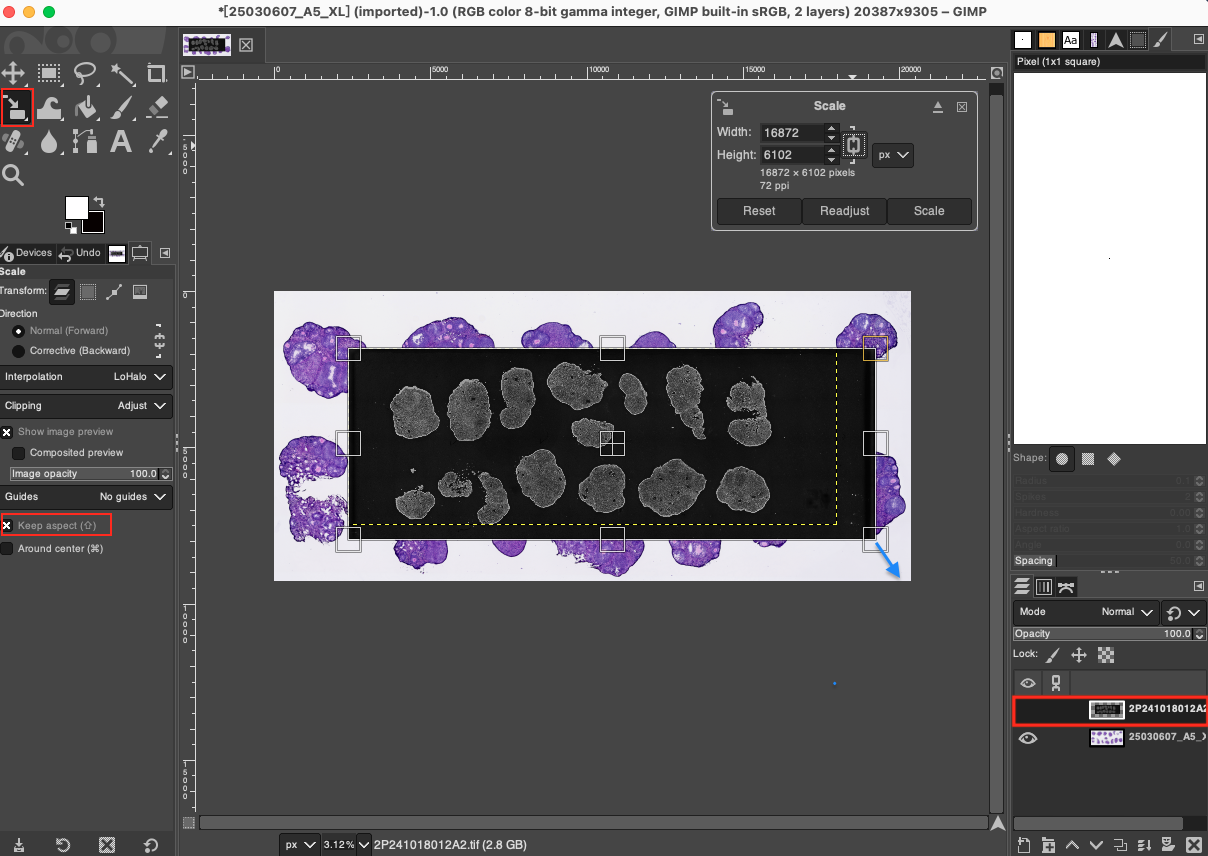
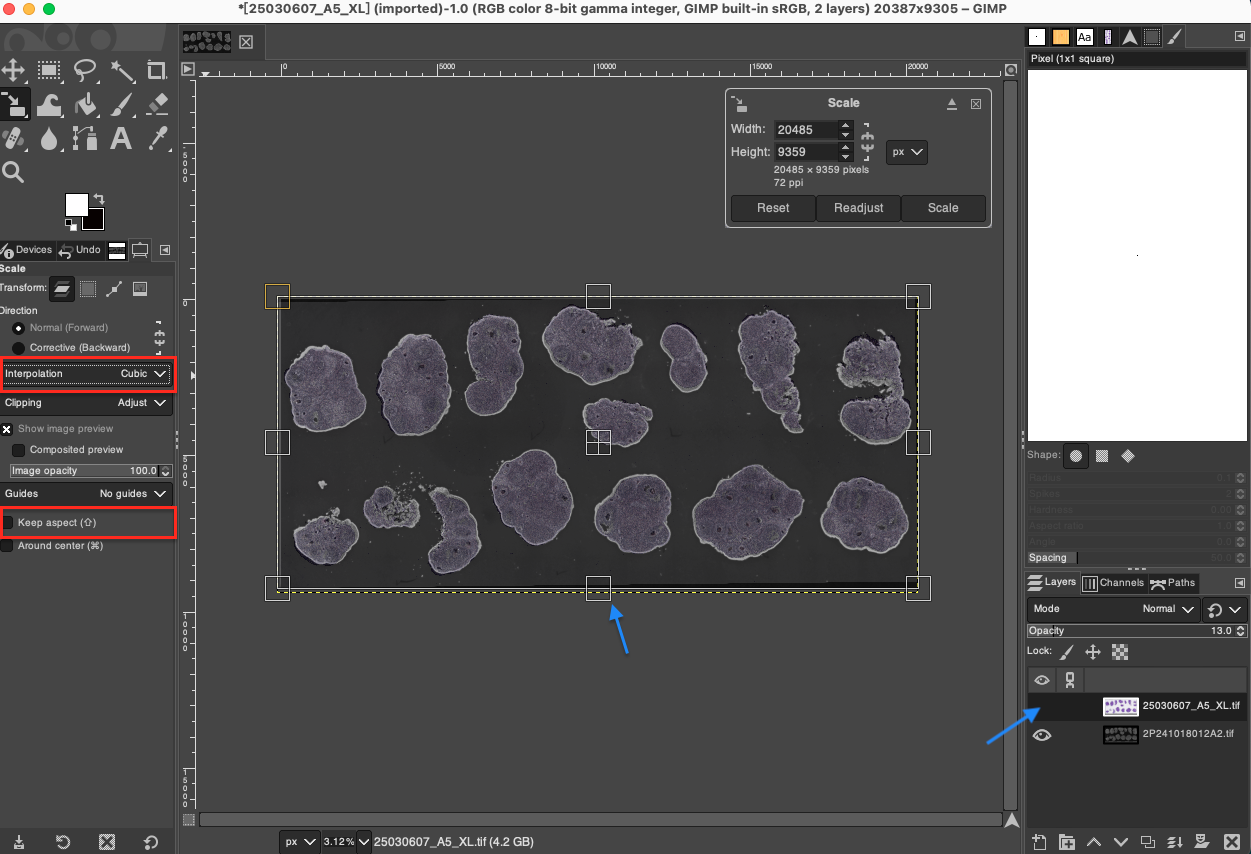
- Scale: First, be sure to select the DAPI layer in the Layers panel. Next, select the Scale Tool in the left toolbar, or use the shortcut key
Shift + S. In the Tool Options panel on the left, ensure that the aspect ratio is locked (click the chain icon to close it, or check Keep aspect). Then click on the canvas to activate the scaling grid, and drag the edge of the grid to stretch or compress it proportionally, making the overall size of the DAPI image roughly equal to the size of the H&E tissue above. Press theEnterkey to apply after the adjustment is complete.
WARNING
Important Note: Throughout the scaling process of registration, you must only perform scaling operations on the DAPI image. Absolutely do not scale the H&E brightfield image, otherwise, it will cause severe pixel interpolation and precision loss to the high-resolution H&E image.
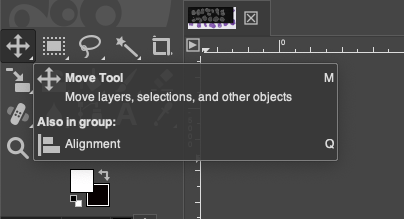
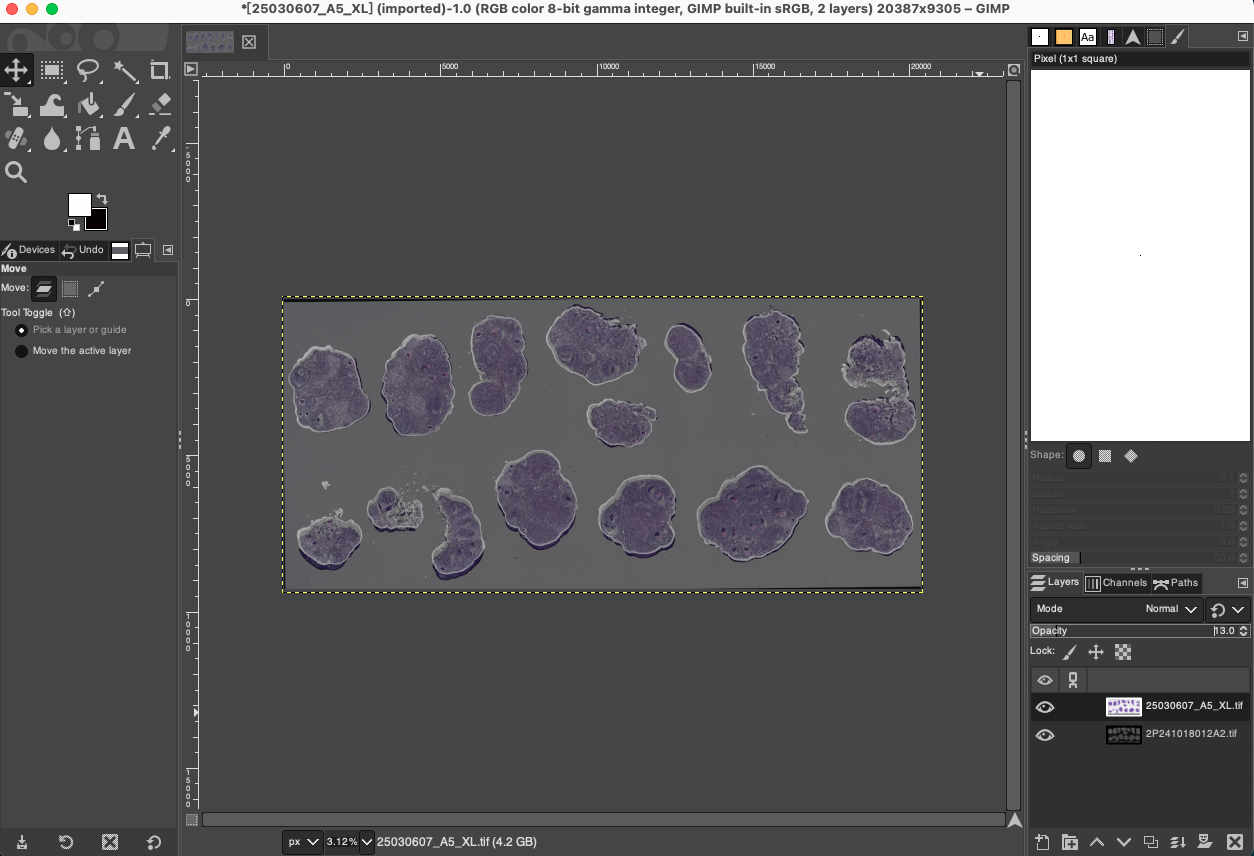
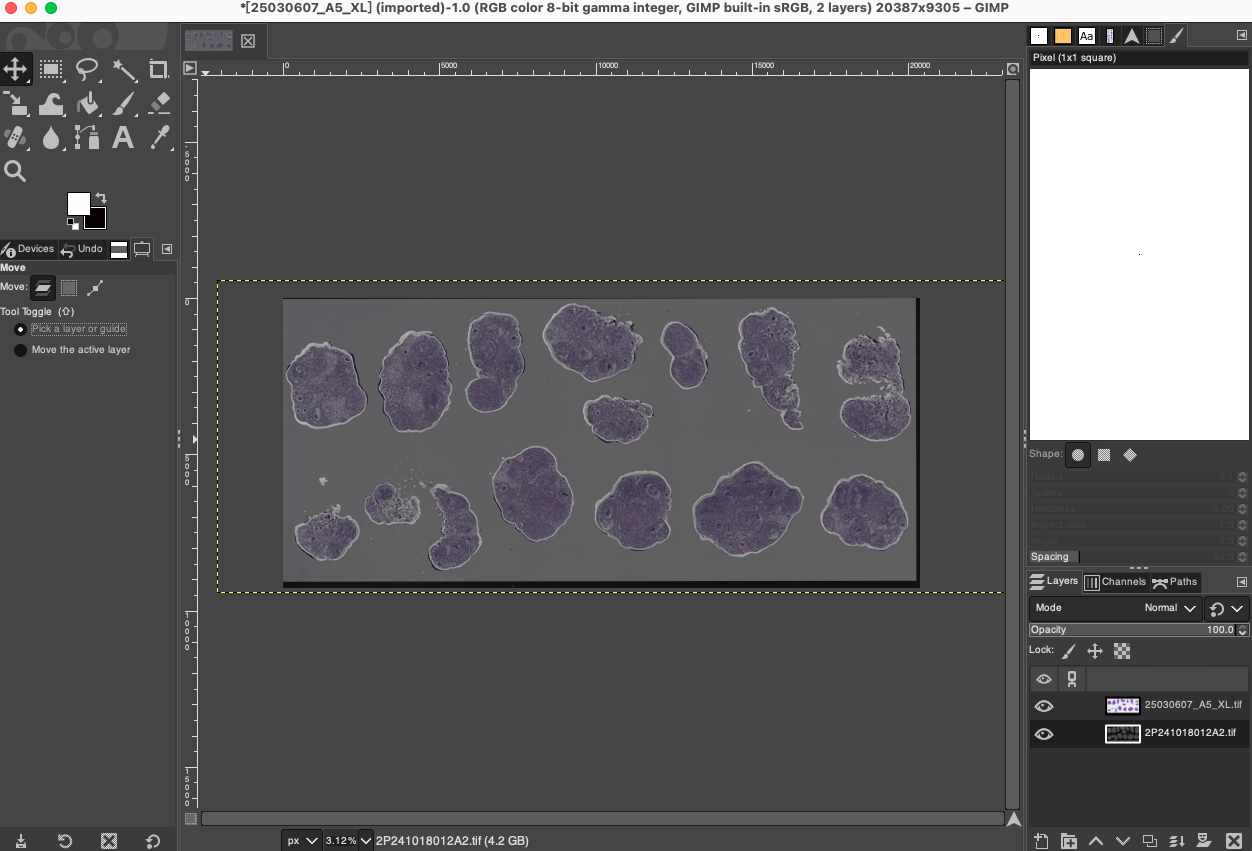
- Move: Select the Move Tool in the toolbar, or use the shortcut key
M. Select the layer that needs to be moved in the Layers panel, hold down the left mouse button, and drag freely on the canvas to perform preliminary alignment and overlapping of major anatomical structures of the tissue in both layers (such as obvious outer tissue outlines, specific cavities, or large blood vessels).
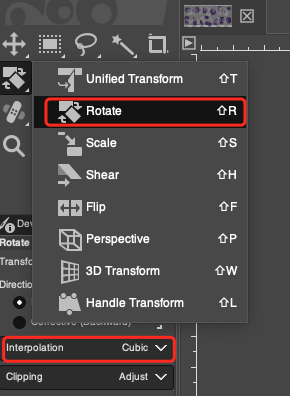
- Rotate: If there is a slight deviation in the angle at which the two adjacent sections were placed on the microtome, rotational calibration is required. Select the Rotate Tool in the toolbar, or use the shortcut key
Shift + R. First, in the Tool Options panel on the left, be sure to set Interpolation toCubic(cubic polynomial interpolation), which ensures high image fidelity during rotation calculations. Select the H&E layer in the Layers panel, click on the canvas, and finely input the rotation Angle in the pop-up control panel, or directly drag the corners of the image with the mouse to manually rotate it. Carefully observe the tissue edges and major vein directions of the two image layers until they perfectly match.
WARNING
Important Note: You must only perform rotation operations on the H&E image. Please note that each rotation will recalculate the image pixels through interpolation, so please minimize the number of times rotation is executed (it is best to continuously adjust the angle in the pop-up panel until perfect, and then click to confirm all at once) to retain the original precision of the H&E image to the greatest extent possible.

Advanced Scaling and Local Feature Alignment (Optional)
Because sections inevitably undergo slight physical deformation (such as local stretching or shrinkage) during preparation, relying solely on overall proportional scaling and rotation is often difficult to perfectly align all regions.
- Use the Scale Tool again to select the bottom DAPI layer. At this time, you can unlock the proportional lock (unlock the aspect ratio limit).
- For local areas with poor overlapping, individually stretch or compress the edges of the DAPI image in various directions. During this process, closely observe the fit of core feature points inside the tissue (such as cross-sections of specific blood vessels, obvious cell clusters, or edges of tissue cavities), and achieve sub-pixel level fine alignment through repeated fine-tuning.
TIP
Alignment Effect Comparison: Through this non-proportional local fine-tuning, ghosting and misalignment phenomena inside the tissue and at the edges can be significantly eliminated, greatly improving the mapping accuracy of spatial transcriptomics data.
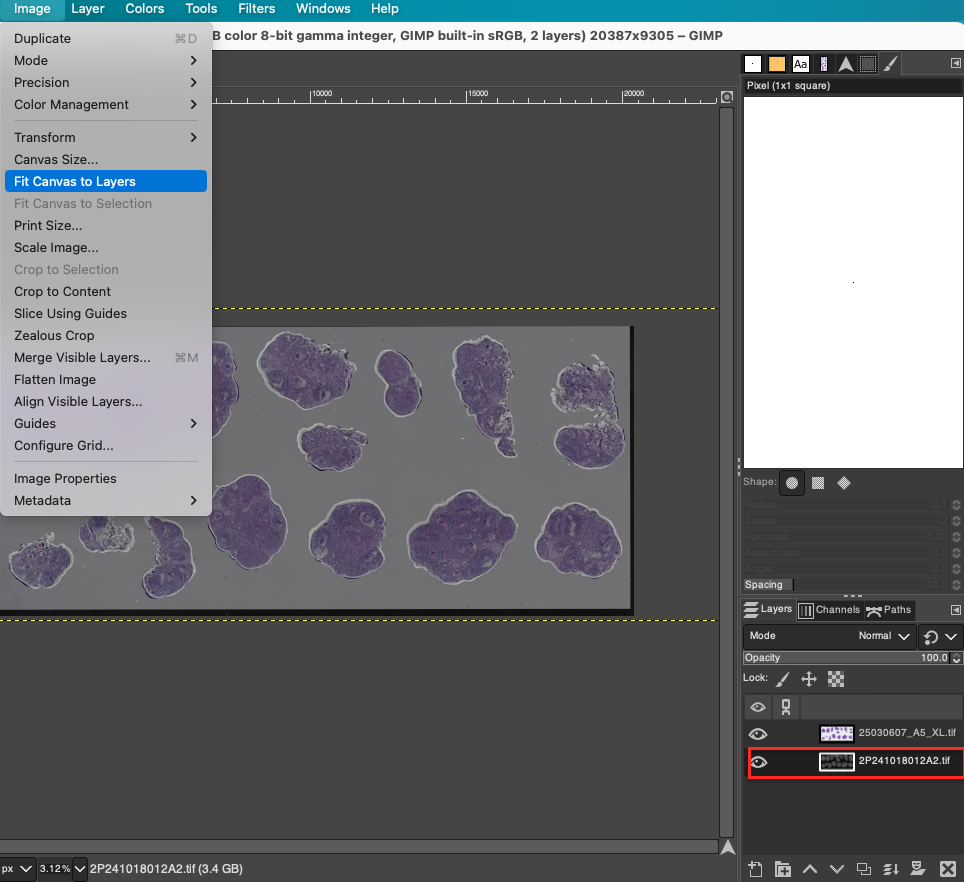
Restore Canvas Size and Background
- Fit Canvas: After undergoing multiple moving, scaling, and rotating operations, the boundaries of the two images have likely exceeded the visible range of the current canvas or left blank areas at the canvas edges. Click Image > Fit Canvas to Layers in the menu bar. GIMP will automatically expand the canvas size to ensure that all image information is completely contained within the visible workspace.
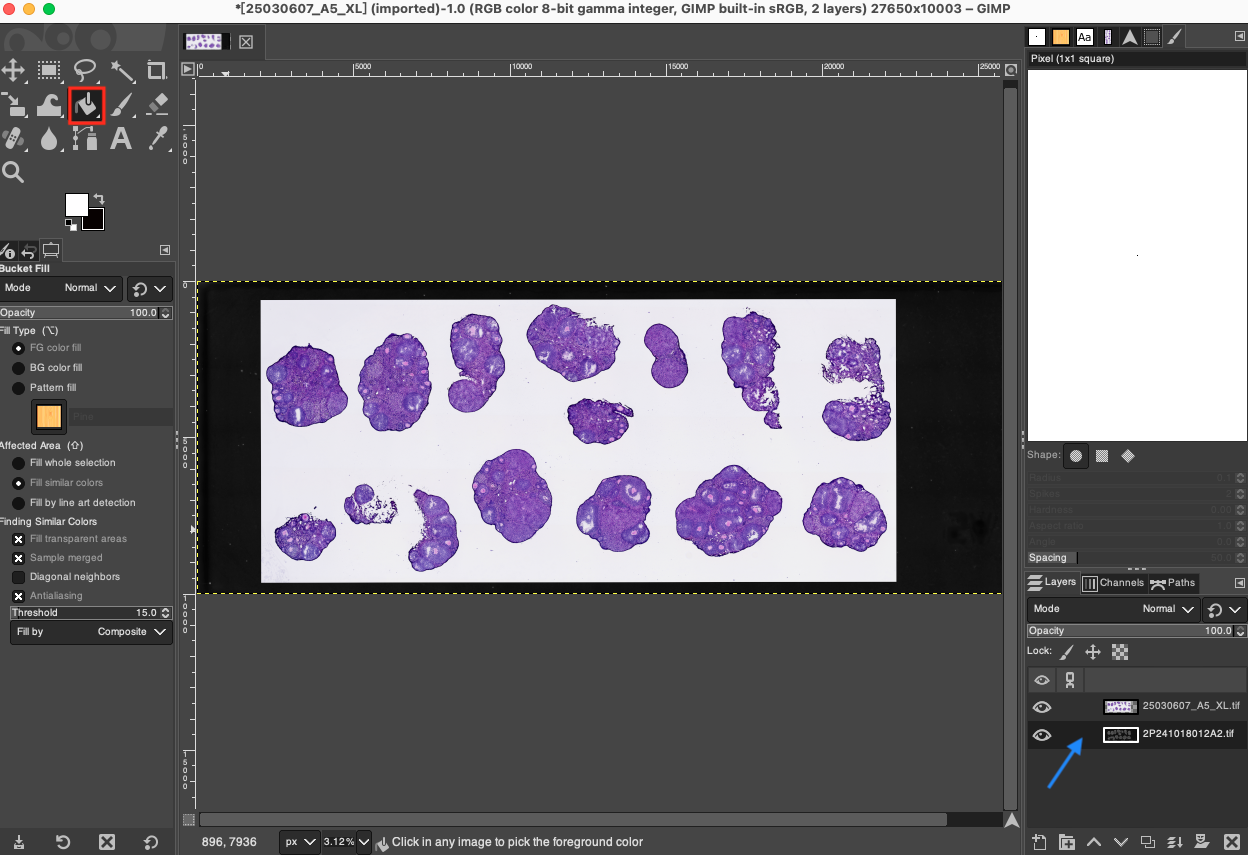
- Fill Foreground Color (Replace DAPI Layer): At this point, due to the expanded canvas, a transparent checkerboard area may appear around the DAPI image. A special note is needed here: in this step, the DAPI image serves merely as a "spatial coordinate scaffold" for aligning the H&E. Once spatial alignment is complete, we no longer need to keep the original DAPI fluorescent image; we need to replace it with a pure white background to complement the brightfield background color of the H&E. Please select the bottom DAPI layer in the Layers panel and ensure the foreground color is set to pure white in the left toolbar. Select the Bucket Fill Tool in the toolbar, or use the shortcut key
Shift + B, and click directly on the canvas to fill the entire DAPI layer along with its surrounding transparent areas with pure white. This ensures that the final merged image has a clean white background consistent with the H&E image.
Merge Layers and Final Export
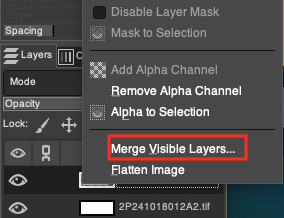
- Restore Opacity and Merge: Before proceeding with the final merge, be sure to first select the top H&E layer in the Layers panel, and pull its Opacity back from the previous 20% to 100%, restoring its original bright colors. After confirming that the two image layers (now the 100% opaque H&E and the pure white background underneath) fully meet expectations, right-click any layer in the Layers panel, select Merge Visible Layers..., and click Merge in the pop-up dialog box to fuse the multi-layer structure into a single image plane.
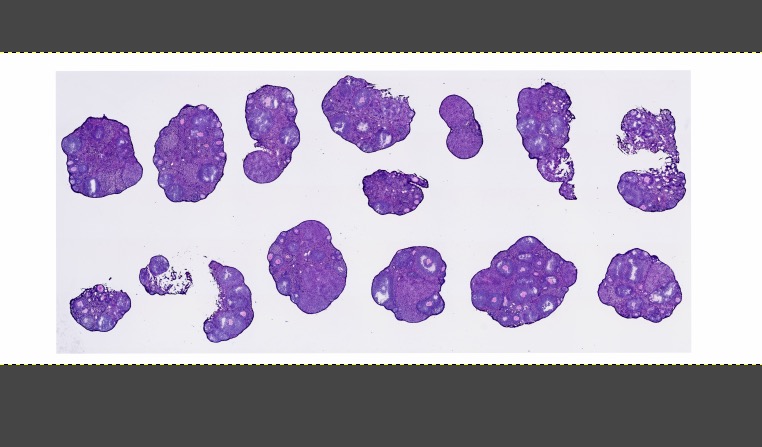
- Export Composite Image: Sequentially click File > Export As... in the menu bar. In the pop-up export window, choose an appropriate file path and name it, then export this high-precision aligned H&E composite image with a pure white background in
.tiffformat to retain the highest image quality for subsequent analysis. With this, the entire registration workflow for adjacent tissue sections is successfully completed.
Phase 3: H&E Image Tissue Extraction and Background Whitening (Optional)
TIP
Application Scenario: If you plan to use the registered H&E image subsequently for super-resolution reconstruction or other advanced analyses sensitive to background, the light-colored background inherently present in the original scanned image (such as the glass background color of the slide or uneven illumination of the scanner) may interfere with the algorithm's judgment. This phase will guide you to extract the true tissue structure and completely replace the original background with the absolute pure white background we created in Phase 2.
Official Tutorial Link: If you want to learn more about the Fuzzy Select Tool (Magic Wand) and advanced background extraction techniques in GIMP, you can refer to the GIMP Official User Manual: Fuzzy Select Tool.
- Add Alpha Channel: In the Layers panel, right-click the top H&E layer and select Add Alpha Channel. If this option is grayed out, it indicates that the layer already contains an alpha (transparency) channel.
- Select Background Area: Select the Fuzzy Select Tool (shortcut key
U) in the left toolbar. - Adjust Threshold and Select Background:
- In the Tool Options on the left, locate the Threshold slider (an initial value of 15-30 is recommended).
- It is recommended to check Feather edges and set the radius to 1-2, which will make the transition of the extracted tissue edges more natural.
- Left-click the mouse on the original light-colored background outside the H&E image. GIMP will automatically select contiguous background areas with similar colors. If the selection is not ideal (selecting too little or encroaching into the tissue interior), please press
Ctrl + Zto undo, adjust the threshold, and click again.
- One-Click Tissue Extraction: After confirming that the selection (the flashing marching ants line) mainly envelops the unwanted background, press the
Deletekey on the keyboard. The original light-colored background will be completely deleted and become transparent, and the underlying layer (the absolute pure white background we filled in Phase 2) will perfectly show through, thus achieving true "background whitening". - Deselect: Click Select > None in the menu bar or use the shortcut key
Ctrl + Shift + Ato cancel the marching ants selection. Zoom in on the image edges to inspect the extraction effect. Once completed, please return to the Merge Layers and Final Export steps in Phase 2 to complete image saving.